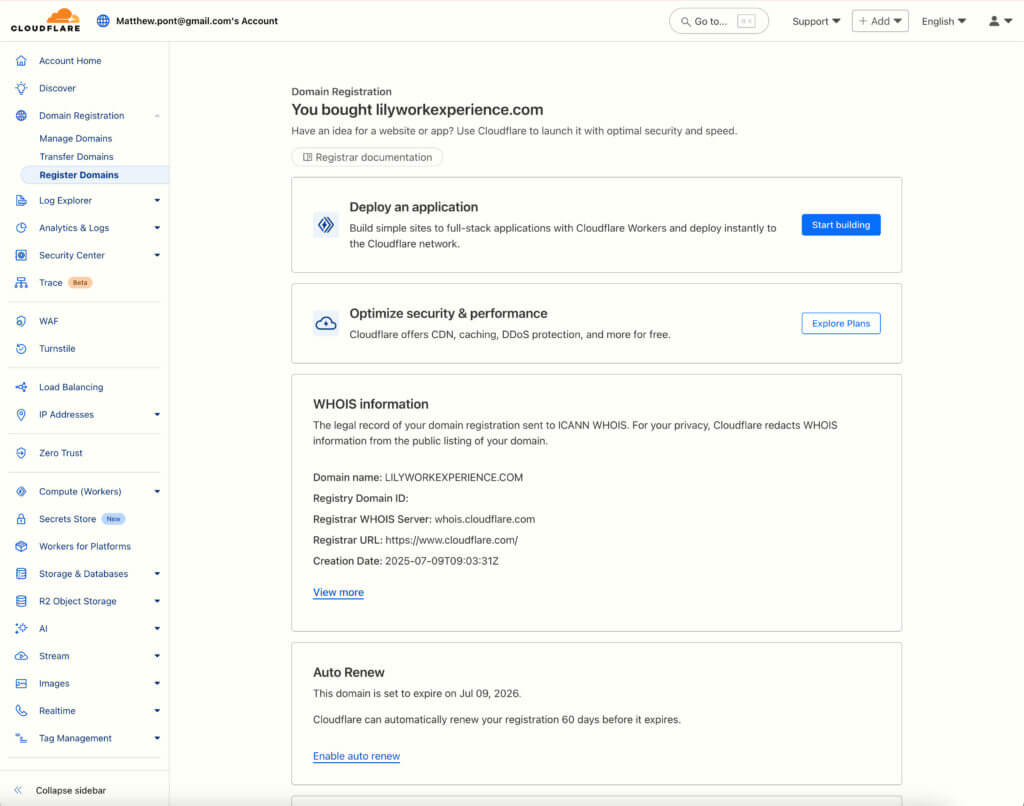
Step 1 – Buying a domain name

After arriving at the office, I begin work on my website. The first process of building a website is getting a domain name, and if available purchasing it. You can buy domain names from registrars of which there are many; GoDaddy, 123Reg, etc. I will be using Cloudflare. After logging into Cloudflare, I must search to buy a domain name, this is done by typing in the name you wish to buy and checking if it’s available, in my case my name ‘lilyworkexperience.com’ was available and we bought it for $10.44.

Step 2 – Setup domain name on hosting

Using WPengine, I will host the newly created domain name. My website will be built with wordpress. After logging into WPengine, I created the WPengine, and then pointed the DNS for the website domain to the hosting. After 5-10 minutes the website was ready.

Step 3 – Create website pages

After choosing a theme and adjusting basic settings, I needed to create pages for my website. The pages I created were; a Homepage, About, Blog and Contact. These would allow the website to be easily used and more accessible, especially after creating a menu which would make changing pages simpler and more obvious.

Step 4 – Creating a logo

Using ChatGPT I created a logo for the website, asking it to create a logo and then specifying colours and themes. 

Task 5 – Creating content

After finishing the design, I needed to fill some of the website with text, in order to check that everything looked correct. This was done through a type of text called ‘Lorem Ipsum’, this is a type of text which looks like readable content but isn’t.

Step 6 – Creating the contact form

In order to create a form for my contact section, I installed a form creator called ‘Gravity Forms’, this created a form for users to fill out and be able to communicate with me. After connecting my email to it, I then applied it to my Contact page using its shortcode. To limit spam, I then created recapture keys, which created an ‘I am not a robot’ checkbox.

Step 7 – Add text to the Home page